|
|
Prepare Paper
- Decide on the size paper you will be
using. Generally, allow for generous margins around the edge of the
plate, usually equall on the top and sides, and approximately
1/2" greater on the bottom margin. (A" bleed print",
however, is printed on a piece of paper smaller than the plate)
- Measure paper for your edition and tear
the edges, using a straight-edge, rather than cutting them. Initial
the back of your paper so you know which is yours in the water
bath!
- Create a template by tracing around
your plate on a piece of heavy paper, showing which way is
"up", and tracing around where your printing paper will be
laid down in relation to the plate. If you want accuracy this will
involve measuring with a ruler. Cover this with a sheet of clear
contact paper so that ink can be wiped off it. Be careful not to get
bubbles or creases in the contact paper. Trim the template so that it
will extend beyond the printing paper on all sides if the printing
paper is laid on top of the template in the correct position. A quick version -- Newsprint
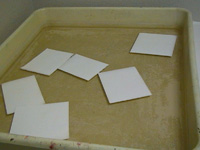
- Soak your printing paper - most sized
papers require at least 20 minutes.
|
|
|
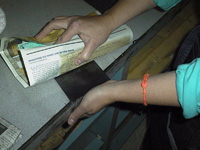
Set-up Press
|
|
|
Ink Plate
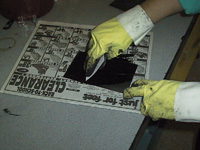
- Ink the plate up using traditional
etching inks. If you use Daniel Smith's Intense Black, add 10-15%
Setswell Compound or Easy Wipe Compound and mix well with a putty
knife on one of the ink slabs. Vine black can be used straight. For
Graphic Chemical Etching Black #514, add light plate oil to soften ink
when it is stiff.
- Use a Scrap piece of matboard or felt
dabber to spread inkcarefully and gently over the plate in all
directions, being careful to fill all etched areas.
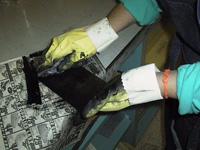
- Take a 36" square tarlatan and
"break it in" if it is new by tugging at it diagonally to
the weave in both directions. Create a large pad and gently wipe the
plate as follows:
- for hardground and softground, in a
circular fashion
- for Imagon, straight across and
straight up and down
- Wipe the plate with used tarlatan and
little pressure to remove most of the ink until the image is somehow
clear yet hazy looking.
- Continue until the surface of the plate
is fairly clean, using cleaner parts of the tarlatan as it picks up
the ink*.
- Follow with clean tarlatan.
- Take care to not overwipe the plate.
- You may want to wipe the edges of the
plate with a rag or paper towel.
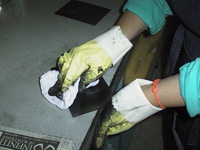
- Some people like to do a final brief
and gentle wipe with telephone-book paper ( sometimes ver a block) for
a brighter background. This will polish the top surface without
removing ink from the deeper areas. Gloves provide friction for
effective wiping.
- The glass like surface of the ImagOn plate
facilitates easy wiping during the intaglio printing procedure which
is the same for conventional intaglio techniques. Because of the
smooth finish of the ImagOn plate there will be virtually no plate
tone present in the finished print. If a printmaker wishes to have a
plate tone the plate should be briefly dry sanded with an electric
palm finishing sander with a 320 grit wet-and-dry sandpaper. The
coarser the sandpaper the greater will be the extent of the plate
tone.
- Use scrap pieces of matboard or a felt
dabber to spread the ink evenly and gently over the plate
- Wipe the plate with used tarlatan and
little pressure in a circular motion to remove most of the excess ink
until the image is somehow clear yet hazy looking.
- Follow with clean tarlatan
- Follow-up with a use telephone yellow page
over block to wipe (polishh) top surface without removing deeper
areas. Gloves provide friction for effective wiping
- Clean the plate edges with paper towel or old
rag.
|
|
|
Paper
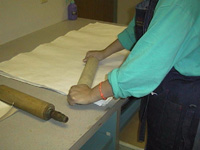
- Take your paper from the water.
Let excess water drip off and put it between two towels and roll out
the water. It should appear matte and not shiny with moisture.
- soak printing paper (25 minutes or more)
- Hang up paper to drip off excess water
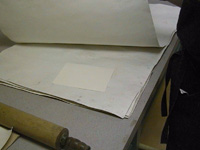
- Press between blotters
- Paper should be damp and soft but not wet to the
touch
|
|
|
Proof
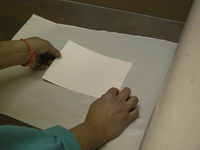
- Used paper for proofing
- newsprint on press bed
- It may be worth noting that the plate can be
proofed at any point without the need to remove the Future.
- Place the freshly inked and wiped plate on the
neswprint press bed.
- Position the printing paper , backing paper and
the blanket.
- Send the press through. The best prints are
obtained from a freshly inked plate.
- Lift the blanket, remove the print and place it
on the drying rack or staple the wet proof to a wall made of homasote.
- Remove the plate and clean the press bed with a
few drops of alcohol.
and Print the Edition
- Place the template you made earlier on
the center of the bed of the press. Put the plate on it, FACE
up..
- The best prints are from a freshly
inked plate.
- Carefully place the paper over the
plate according to the markings you have made on your template. Cover
the printing paper with another, larger, sheet of clean
newsprint.
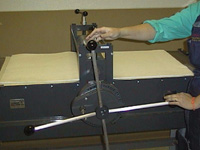
- Position the blankets over the
template, plate and paper: Make sure that there are no wrinkles.
- Crank the handle of the press so the
roller passes over the plate and paper completely, taking care not to
stop over the plate itself.
|
|
|

- Pull back the blankets and remove your
print, picking it up slowly from one corner, and place on racks to
dry.
- You need to re-ink between each print pulled
|
|
|
Print Yield
- The print yield for one plate can be as much as
40 prints but the factors for print yield vary according to the how
the plate is wiped, how much press pressure is used and the nature of
the image printed. Images with a great deal of black areas have a
tendency to break down first because these areas of the plate holds
the smallest percentage of ImagOn emulsion. Making plates with small
uninked boarders also extends the life of a plate because of the
bridging effect the etching press roller has on the plate. For this
same reason late 19 century mezzotint artists made borders on their
plates.
- The print yield for each plate is really
determined by when the black areas of the print start to fade. Once
this happens these black areas can be reworked with liquid ImagOn
emulsion.
Clean-up
- If you will not be printing another
print immediately, clean the ink off your plate with vegetable oil and
a rag. Clean up ink etc. the same way. Put all paper, templates,
plates etc. away in your drawers and shelves, and keep the shop clean
and tidy to maintain a good work environment.
- With Vegetable oil (canola) , degrease with
magnesium carbonate
- Old method: clean the plate with paint
thinner, follow up with alcohol, apply a thin coat of ground, and wrap
with paper for storage.
- If ink is being shared, make sure that
a fair division of labor is agreed upon.
- Ink soiled newsprint, solvent soaked rags, etc should be placed in
the red cans for disposal. Other cans are provided for paper towels
from hand washing, etc.
|


